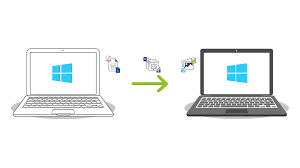
Migrating data from multiple user accounts on a PC can be a straightforward task if you follow the right steps. This process helps consolidate user files, settings, and preferences, making it easier to manage and access important information. Here’s how to carry out this migration effectively.
1. Prepare for Migration
Before starting the PC migration process, take some time to prepare. This preparation involves several steps to ensure you do not lose any data during the transfer.
a. Backup Data
Always start by backing up data from all user accounts. Use an external hard drive or cloud storage to save essential files. This step protects against data loss during migration.
- Log into each user account.
- Locate important files, such as documents, images, videos, and downloads.
- Copy these files to the backup location.
b. Check Storage Space
Ensure the destination account or device has enough storage space for all the data. Check the available space in the user account you plan to transfer data to.
2. Identify User Accounts and Data to Migrate
Next, identify the user accounts on your PC and the specific data you want to migrate. This helps you keep track of what needs to be moved.
a. List User Accounts
Create a list of all user accounts on the PC. This can usually be found in the Control Panel under “User Accounts” or “Accounts.”
b. Decide on Data
Determine which files and folders you want to move. Common items include:
- Documents
- Photos
- Videos
- Music
- Desktop items
- Browser bookmarks
3. Use Windows File Explorer for Migration
Windows File Explorer provides a simple method to transfer files between user accounts. Follow these steps to move data using File Explorer.
a. Access User Folders
- Open File Explorer by clicking the folder icon in the taskbar.
- Navigate to “C:\Users” to see all user folders.
- Open the folder of the user account from which you want to migrate data.
b. Select Files and Folders
Select the files and folders you wish to transfer. Hold down the Ctrl key to select multiple items.
c. Copy or Move Data
Right-click on the selected items and choose “Copy” or “Cut.” Then, navigate to the destination user account’s folder.
- Open the folder of the destination account.
- Right-click in the folder and select “Paste.”
4. Transfer Application Data
Some applications store user-specific data that requires a different approach. Consider the following for applications such as web browsers and email clients.
a. Web Browsers
For browsers like Chrome or Firefox, export bookmarks and settings. Each browser has an export feature:
- Chrome: Go to the settings menu, find “Bookmarks,” and use the “Export bookmarks” option.
- Firefox: Access the library, click “Import and Backup,” then choose “Export Bookmarks to HTML.”
Once exported, import these bookmarks into the browser on the destination account.
b. Email Clients
If using an email client like Outlook, export emails and settings:
- Open Outlook and navigate to “File.”
- Choose “Open & Export” and select “Import/Export.”
- Choose “Export to a file” and follow the prompts to save your email data.
5. Transfer Settings and Preferences
Some user settings, such as desktop backgrounds, themes, or account preferences, do not migrate automatically. Follow these steps to transfer them.
a. Desktop Background and Themes
Manually set up the desktop background and themes in the new account. Locate the desired image files in the original user account and transfer them using the methods described earlier.
b. Application Settings
Most applications save user settings within their folders. Check the installation directory for configuration files and copy them to the new user account if necessary.
6. Using Windows Easy Transfer or Third-Party Tools
If dealing with a large amount of data, consider using tools designed to simplify the process.
a. Windows Easy Transfer
Windows Easy Transfer, available in older versions of Windows, allows users to migrate data easily. Check if it is available on your system:
- Launch the application.
- Follow the prompts to select the data to migrate.
- Choose the destination account and start the transfer.
b. Third-Party Migration Tools
Several third-party tools can assist in data migration. Look for tools such as Laplink PCmover or EaseUS Todo PCTrans. These tools often provide a user-friendly interface to transfer files and settings.
- Download and install the tool.
- Follow the on-screen instructions to select source and destination accounts.
- Start the migration process.
7. Verify Data Transfer
After completing the migration, verify that all data transferred correctly. Log into the destination user account and check for the following:
- Files and folders should be present and accessible.
- Application data, bookmarks, and email settings should work as expected.
- Preferences, including desktop settings, should be properly configured.
8. Clean Up Old User Accounts
Once you confirm successful data migration, decide what to do with the old user accounts. If you no longer need them, you can delete them to free up space.
a. Deleting User Accounts
- Open the Control Panel.
- Navigate to “User Accounts” and select “Manage another account.”
- Choose the account you want to remove and click “Delete the account.”
Choose whether to keep or delete the user’s files based on your previous backup.
9. Keep Data Secure
After migration, ensure the security of the data in the new user account. Set strong passwords and enable any available security features, such as two-factor authentication, for accounts that support it.
10. Troubleshooting Common Issues
Sometimes issues arise during migration. Here are solutions to common problems.
a. Missing Files
If some files do not appear in the new account:
- Double-check the source account to confirm the files were copied.
- Ensure you have permission to access certain files or folders.
b. Application Errors
If applications do not function properly:
- Reinstall the application in the new account to ensure it recognizes the new user settings.
- Check for updates to the application that might resolve compatibility issues.
Conclusion
Migrating data from multiple user accounts on a PC does not need to be complicated. By following these steps, you can ensure a smooth transition of files, settings, and preferences. Always prioritize data backup and verification to maintain data integrity throughout the process. With careful planning and execution, you can successfully consolidate user data and enjoy a more organized computing experience.